
Build A Home Studio That Delivers
The 4-Mic Philosophy: How to Build a Home Studio That Delivers
You do not need more microphones. You need better ones — and a clearer idea of what you are trying to do with them.
Part 1 of the Recording Smart series — a practical guide for home recorders serious about getting their sound right without wasting money on the wrong things.
Here is a question worth sitting with: if you handed Glyn Johns four microphones and pointed him at a drum kit, do you think the result would be worse than what most home studios are producing today with sixteen?
The answer is obviously no. And that gap — between what great engineers have always done and what most people setting up home studios actually do — is exactly what this series is about.
This is not an argument against gear. It is an argument for buying the right gear in the right order, with a clear philosophy behind your decisions. If you are serious about home recording and you have somewhere between two and five thousand dollars to spend, this is where to start thinking.
The Idea Behind the Philosophy
The 4-mic philosophy is not a hard rule. It is a framework — a way of forcing yourself to make deliberate decisions instead of accumulating equipment and hoping it adds up to something. The number four is a starting point, not a ceiling. You can make a great recording with four well-chosen microphones. You can also make a great recording with six, seven, or eight. What you probably cannot do is make a great recording with twenty microphones you do not fully understand yet.
The point is this: start with a core. Know exactly what each microphone does and why it is there. Build from a place of intention rather than anxiety. More mics mean more decisions, more phase issues, more variables to manage. When something goes wrong — and something always goes wrong — fewer mics means fewer places to look.
There are many different combinations of four to six microphones that can make great recordings. The question is not how many you have. It is whether you know what you are doing with the ones you own.

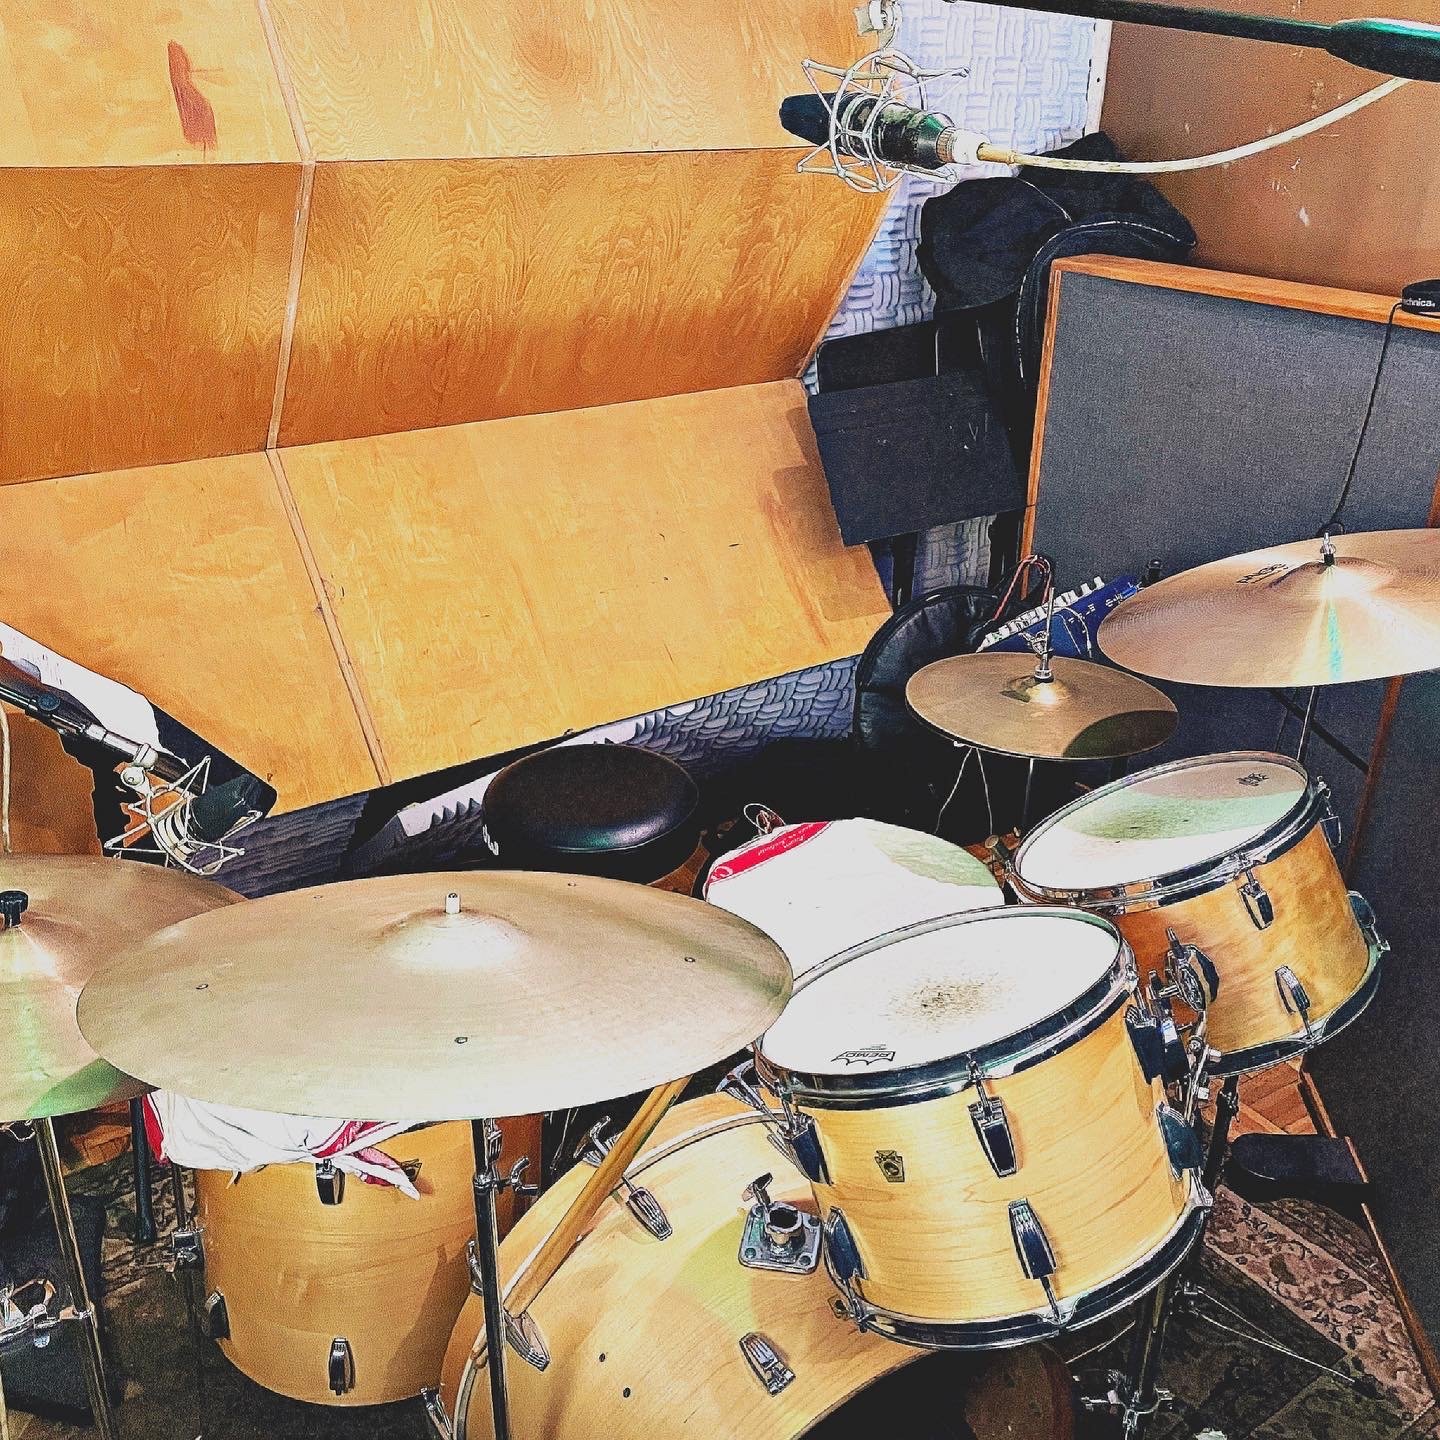
Some staples for the studio budget.
What Abbey Road and Glyn Johns Already Proved
This is not a new idea. It is a very old one that the industry largely forgot when the cost of adding tracks dropped to zero.
Go back to early Abbey Road — 1964, a Beatles session. The mic list for a full band recording was essentially this: a shared Neumann U48 for John and Paul's vocals, a D19 as a drum overhead, a D20 on the bass drum, U48s on John and George's guitar amplifiers or acoustics, and a D20 on Paul's bass amp. That was the entire session. No room mics. No second snare mic. No sample augmentation. Six microphones, maybe, and several of those were the same model used in different spots.
Here is the thing about those early sessions that often gets misunderstood: those recordings sound like 1964 because of the technique, the medium, the era, and the cutting expectations of the engineers at the time — not because the microphones were incapable of more. A U47 or U48 tracked into a modern converter with a skilled engineer today can sound extraordinary. Sonically, those mics are still some of the best ever made. What changed over time was everything around them — the rooms got bigger and deader moving into the 70s, sounds got wider and more dimensional, and engineers started pushing for more separation and depth. The mics were largely the same. The approach evolved. Every microphone in those early sessions had a specific job. Nothing was there speculatively.
Glyn Johns operated the same way. If he liked a microphone, he used it everywhere — U67s and U87s on guitar amps, acoustics, vocals, wherever a mic needed to go. His drum overhead technique, which still works on every kit in every genre in 2026, uses two matched overheads and one on the bass drum plus a snare mic — four microphones for a complete drum kit. It sounds like a drum kit in a room, because that is what it is. The simplicity is the point.
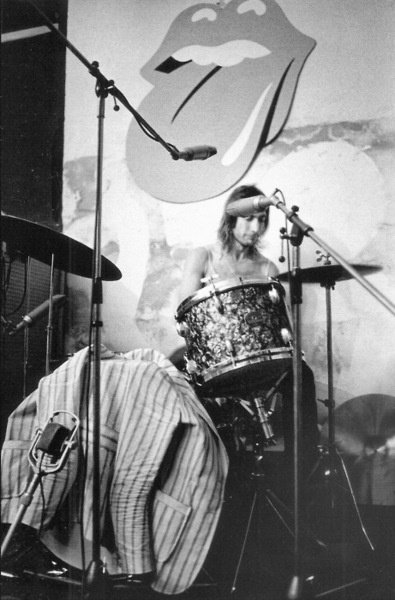
The Glyn Johns with Charlie Watts during the Exhile sessions: two U67's (top and side, one on the kick, sometimes a snare mic too) It works on every kit, in every genre, every time.
First, Deal With Your Room
Before any conversation about microphones, there is one thing that matters more than all of them combined: the room you are recording in.
A great microphone in a bad room records a bad room. There is no way around this. Phase issues, bad reflections, low-end buildup in corners — none of that gets fixed in the mix. It gets worse. If your room sounds terrible, spending more money on microphones is not going to help you.
The good news is that you do not need an acoustically designed space to get started. You need a room that is not actively working against you. The simplest version of that is a dead room — one with enough absorption that you are not capturing a bunch of ugly reflections along with your signal. If you are in doubt about your room, dead is the right direction.
Moving blankets from Home Depot. Seriously. Hang them, drape them, stack them. It is not pretty, it is not permanent, but it will immediately reduce bad reflections and give your microphones a fighting chance. You can build from there. But start there before you spend a dollar on another piece of equipment.
Fix your room before you buy more mics. A decent microphone in a treated space will beat an expensive microphone in an untreated one every single time.
So Where Do You Start?
If you are spending two to five thousand dollars building out a serious home setup, the answer is not to buy everything at once. It is to buy the right things first and understand them completely before adding anything else.
That means starting with microphones that earn their place by doing more than one thing well. A large diaphragm condenser that sounds right on vocals will likely also perform on acoustic guitar, on a guitar amp, on a room. A dynamic mic that handles a loud snare will handle a loud amp without flinching. When every microphone in your locker can pull double or triple duty, four starts to feel like plenty.
The specific recommendations — what to actually buy at each budget tier, how to approach drums, vocals, and tracking a full band in a small space — are covered in the next part of this series. Three budgets, concrete picks, no filler. The goal is a list you can actually use.
But start here. The philosophy comes before the gear list. Know why every microphone is there. Know what it is doing. Know what you would lose if you pulled it. If you cannot answer that question clearly, you probably do not need it yet.
Or be Geoff Emerick, all you need are a bunch of D19's. Just kidding!
Want to talk through your setup?
Clay Blair has been recording, producing, and mixing at Boulevard Recording in Hollywood since 2010. If you are trying to figure out where to spend your money and what to do with it, he has heard every version of this problem.
Call: 323-337-6911
Email: jaymes@boulevardrecording.com
Visit: 6035 Hollywood Blvd, Hollywood
One room. One client at a time. One focus: your music.